The QuikStep project keeps information about aspects of an ESL for Windows application. This information is saved with the project. The following lists some of the information saved with a project.
•Primary ESL source (.EAL) filename and directory location
•Compiler and runtime installation information. (This is useful for users supporting applications with more than one version of the ESL for Windows production system.)
For ESL Developers who are new to the ESL environment, ESL Syndetic provides a QuikStep tutorial application with the ESL Development Tools installation. If you have never used QuikStep before, it is recommended that you use this tutorial application before attempting to debug your own applications.
As with all projects, use the Project New command (or  toolbar button) to start a new QuikStep project. Having confirmed that any open project may be closed, you will be presented with the Project Files dialog. The only required file is the Primary Source, which is the main ESL application source code file, which typically has the file extension ".eal". Use the "Browse..." button to navigate to and select the tutorial's Primary Source. The required file for the tutorial is "QSDEMO.EAL", which is in the "qstutor" sub-directory of the main ESL Syndetic directory.
To enable the debug to work, the ESL application must be compiled with the command line option "-debug". To add the debug option by default, go to the Project Settings dialog by pressing the "Settings..." button on the Project Files then ensure the "Debug" checkbox is set. If you forget to set the Debug option, you will be warned when attempting to run the application with debug. To set the Debug option after having created a project, you must return to the Project Settings by using the Project / Edit command, and use the "Settings..." button as before.
With the QuikStep tutorial, no other files or settings are required, therefore you should click "OK" on the Project Settings and Project Files dialogs.
Use the Project Compile command (or  toolbar button) to invoke the ESL compiler. The tutorial application contains no syntax errors so will compile first time, however, when compiling your application, all errors must be corrected and application re-compiled before proceeding.
To step through the application, start the ESL runtime in Debug mode using the Run with Debug command (or  toolbar button). When the application starts, you may either step through a statement at a time using the Debug Step command (or
  toolbar button) or allow the application to proceed to the end of a response (or a breakpoint) by using the Debug Go (or
  toolbar button).
As most applications will be too large and complex to step through all the code, it is recommended that breakpoints are used to stop the application at the processing logic that requires attention. To set a breakpoint, navigate to the source code whilst in Debug Mode and double click on a suitable ESL action statement, the breakpoint will hi-lighted in red:
The simplest method to navigate to the source code file containing the logic to be debugged is to locate the include statement within the Primary Source file, which will be displayed when the Debug Mode is started, and double click. If the line number of the statement is known, then the source code window can be scrolled using the Goto Line command, or use the Breakpoints command.
If you wish to return to step mode after using the Debug Go command, use the Debug Stop command (or  toolbar button).
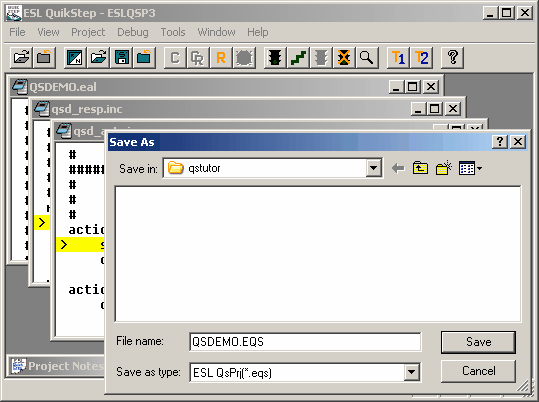
To complete your project, add any free form notes to the Project Notes window, before saving the QuikStep Project using the Project Save command (or toolbar button).